UNLOCKING THE ENCHANTED LIFE! UNLOCKING THE ENCHANTED LIFE!
Home / Tips and Guides

Tips and Guides

Linkstyle App Guide: Overview, General UI Elements and Navigation

Linkstyle App Guide: Overview, General UI Elements and Navigation

Introduction

The Linkstyle app provides a user-friendly interface to manage your smart home devices, automations, and account settings. This guide explains the general UI elements and navigation based on the app’s main tabs and functionalities.

Main Navigation Tabs

The Linkstyle app is divided into several tabs accessible via the navigation bar at the bottom of the screen:
  1. Devices
  2. DIY
  3. History
  4. Account

Devices Tab


The Devices Tab is the central hub for managing and monitoring your smart home devices.
  • Top Bar Features:
    • Location Selector: Allows you to switch between different locations (e.g., "Home", "Office") by tapping the drop-down menu.
    • Add Device (+): Use this button to add new devices to your selected location.
  • Device Overview:
    • You can set shortcuts to frequently-used devices as favorite devices by tapping the "Edit" option in "Protect Devices"
    • All of the devices you have added to a location are displayed in the Devices Tab. Each device card shows the device icon, device name, and relevant device statuses depending on what the specific device is. Offline devices will be specified, and some device cards show basic metrics (such as temperature, moisture, and battery level for the AFRA soil sensor).
    • Tap a device to view detailed settings, including control options and advanced features like schedules or logs.

DIY Tab

The DIY Tab provides tools for setting up automations and routines.
  • Automation Section:
    • View existing automations categorized by name.
    • Toggle automation on or off using the switch on the right.
    • Tap an automation to edit its tasks or triggers.
  • Tap-to-Run Section:
    • Set up quick actions that can be manually triggered.
    • Perfect for tasks like turning multiple devices on or off with a single tap.
  • Community Tips:
    • At the top of the DIY tab is the link to the Linkstyle Community Forum, where you can find helpful tips and support information.

History Tab


The History Tab logs notifications, alerts, and device activities for easy reference.
  • Alarm Section:
    • View alerts such as scheduled task failures or device status changes.
    • Details like timestamps and affected devices are included.
    • Messages sent through DIY automation routines will show up in this section.
    • Tap "View" for more information on specific alerts.
  • Bulletin Section:
    • Displays account-related notifications, such as login attempts.
    • Helps ensure your account security and keeps you informed about system changes.
  • Home Section:
    • Provides a chronological log of actions, such as adding or removing devices, and system updates.

Account Tab

  1. Account Tab
The Account Tab contains user profile settings and app configuration options.
  • User Profile:
    • View your profile picture, email address, and account details.
    • Access settings for cloud storage and linked services.
  • Basic Services:
    • Manage features like location settings, camera configurations, and smart protection.
  • Additional Features:
    • Access third-party voice services (e.g., Alexa, Google Assistant).
    • Explore community resources, shop for devices, and view app version information.

See this article for details.

Additional Tips

  • Switching Locations: Tap the location selector in the Devices Tab to seamlessly switch between multiple homes or areas. See this article for details.
  • Real-Time Updates: Keep an eye on device status and notifications for real-time insights into your smart home.
  • Editing Automations: Use the DIY Tab to fine-tune or create new routines to suit your needs. See this article for details.
With these features and tools, the Linkstyle app makes it easy to manage your smart home devices and automations efficiently.
  • test
    • test child


Title: Smart Water Valve Sprinkler Timers: Best Use Cases and Automation Limitations

Title: Smart Water Valve Sprinkler Timers: Best Use Cases and Automation Limitations
Smart water valve sprinkler timers are innovative devices designed to simplify irrigation by offering features like scheduled watering and remote control via smartphone apps. They can be an excellent addition to your smart gardening toolkit, making routine watering tasks more efficient and convenient. The focus of this article is one such device - the Linkstyle Hydrozen Smart Sprinkler Water Timer. While the Hydrozen shines in many use cases, it does have limitations when integrated into more complex automation setups. This article explores its best applications and highlights the constraints you should consider when incorporating it into your garden.

Overview of Features

The Linkstyle Hydrozen comes packed with features that cater to a wide range of irrigation needs. Key capabilities include:
  • Scheduled Watering: Automate watering sessions at specific times of the day to maintain consistent irrigation.
  • Remote Control: Manage watering sessions from anywhere through the Linkstyle app, providing flexibility and control even when you’re away.
    By leveraging these features, the Hydrozen helps save water, improve plant health, and reduce the hassle of manual irrigation.

    Recommended Uses

    The Linkstyle Hydrozen Smart Water Timer is ideal for the following scenarios:

    a. Scheduled Watering

    Predefined watering schedules are perfect for gardens, lawns, and potted plants. For instance, you can program the timer to irrigate early in the morning or late in the evening when evaporation is minimal. Besides a regular watering schedule, the Hydrozen also features a cycle-and-soak schedule type where water from the repeated cycles are given ample time to seep into the soil in between bursts of irrigation.

    b. Remote Control

    Whether you’re on vacation or just forgot to water your plants, you can manually trigger watering sessions from your phone. This flexibility ensures your garden stays healthy even when you're not home.

    c. Rain Delay

    There is an automatic rain-delay mechanism you can toggle that skips scheduled watering sessions when it rains, preventing over-watering and saving water.

    Limitations in Automation

    While the Hydrozen excels in basic scheduled tasks, it faces challenges with advanced automation setups. Here’s a closer look at its limitations:

    a. Soil Sensor Integration Challenges

    • Built-in Timer Restriction: The Hydrozen water timer's automated trigger comes with a built-in 10-minute automatic shutoff for safety and water conservation. However, this restriction can disrupt soil sensor-triggered routines. For example, if your soil’s moisture level hasn’t reached the desired threshold within 10 minutes, the system may not restart watering automatically.
    • Moisture Threshold Issue: These systems struggle with dynamic thresholds. For instance, if your setup requires watering to start at 10% soil moisture and stop at 20%, the timer might not re-trigger after the 10-minute shutoff if the moisture remains below 10%.
    • Example: Imagine a dry patch of soil starts at 5% moisture. After 10 minutes of watering, the level rises to 8%. The system will stop, but it won’t restart since the 10% threshold wasn’t crossed, leaving your plants under-watered.

      Tips for Workarounds

      Despite these limitations, there are ways to maximize the effectiveness of your smart sprinkler timer:
      • Use Manual Checks: Complement automated routines with periodic manual checks to ensure your plants are getting the right amount of water. Consider integrating the AFRA series of soil sensors to help keep an eye on your garden or plants.
      • Optimize Placement and Scheduling: Position sensors and sprinklers strategically to maximize coverage and schedule watering sessions during optimal times to reduce reliance on dynamic automation.
      • Rely on Traditional Gardening Knowledge: While modern gadgets like water timers bring significant convenience, they are not yet advanced enough to replace human expertise. Referring to traditional gardening practices, such as understanding your plants' specific needs and observing seasonal variations, remains essential for optimal results. Combining this knowledge with smart tools can yield the best outcomes.

        Conclusion

        Smart water valve sprinkler timers are fantastic tools for simplifying irrigation and enhancing garden care. They work best for scheduled watering, remote control, and simple automation routines. However, their limitations in advanced automation setups, especially when using soil sensors or integrating with third-party platforms, can pose challenges. By understanding these constraints and applying practical workarounds, you can make the most of your smart sprinkler timer and ensure a thriving garden.

        Intro to Different SD/MicroSD Card Formats and How to Format Them on Windows and MacOS

        Intro to Different SD/MicroSD Card Formats and How to Format Them on Windows and MacOS


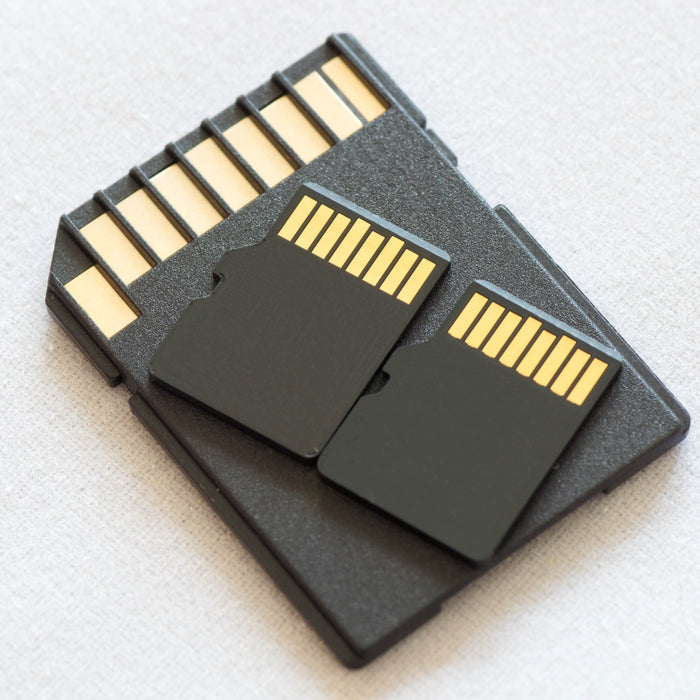
        Secure Digital (SD) and MicroSD cards are essential storage solutions used in devices like cameras, smartphones, and laptops. Linkstyle cameras such as the Quistro Battery Powered Wifi Outdoor Security Camera accommodate MircroSD cards for local storage. While these cards appear similar, their performance and compatibility can vary depending on their format. Formatting SD and MicroSD cards is crucial to maintain efficiency and ensure compatibility with your devices. In this article, we’ll explore the common SD card formats and provide a step-by-step guide to formatting them on Windows, and Mac.
        NOTE: Sometimes MicroSD cards may be referred to as "TF cards". A TF card is exactly the same as a MicroSD card, they are interchangeable terms for the same thing.

        Understanding SD/MicroSD Card Formats

        SD cards come in various formats, each catering to specific storage and speed requirements. When we talk about SD/MicroSD card formats, we could be refering to capacity classes, file system types, or speed classes. In the case of "formatting an SD/MicroSD card", we usually mean changing its file system type, which is what this guide is about.
        File System Types
        • FAT16: Used for cards up to 2GB; limited compatibility with modern devices.
        • FAT32: Supports up to 32GB; widely compatible but with a maximum file size of 4GB.
        • exFAT: Designed for SDXC and SDUC cards; supports larger file sizes and storage capacity, making it ideal for high-performance tasks.
        • NTFS: Rarely used for SD cards due to compatibility limitations with non-Windows devices.


          Why Format Your SD/MicroSD Card?

          • Improve Performance: Formatting removes fragmentation and improves write speed.
          • Resolve Errors: Clears corrupted files and fixes card errors.
          • Compatibility: Ensures the card uses a file system compatible with your device.


            How to Format SD/MicroSD Cards

            NOTE: Formatting an SD/MicroSD card will erase its content. Make sure to back up its stored data/files before formatting a card.

            On Windows

            1. Insert the SD card: Place the SD card into your computer's card reader.
            2. Open File Explorer: Access your computer's file explorer.
            3. Locate the SD card drive: Identify the drive letter representing your SD card.
            4. Right-click and select "Format": Right-click on the SD card drive and choose "Format".
            5. Choose file system: Select the appropriate file system (usually FAT32 for smaller cards, exFAT for larger cards).
            6. Start formatting: Click "Start" to begin the formatting process.
              If you need a visual guide, check out these videos for how to format SD and MicroSD cards on Windows 11.

              On macOS

              1. Insert the SD card into your Mac's SD card slot or a connected SD card reader.
              2. Open Disk Utility from Finder > Applications > Utilities.
              3. Select the SD card from the sidebar.
              4. Click the Erase icon in the top toolbar.
              5. Name the card and choose a system format:
                MS-DOS (FAT)/FAT32: For cards 32 GB or less
              6. ExFAT: For cards 64 GB or larger
              7. Click Erase.
              8. Wait for the formatting to finish, then click Done.
              9. Safely remove the SD card.
                If you need a visual guide, check out this video for how to format SD or MicroSD cards on MacOS.

                Tips for Formatting SD Cards

                • Backup Data: Formatting erases all data. Ensure you back up any important files beforehand.
                • Use SD Association Software: The SD Association provides a dedicated formatter tool for SD cards, ensuring optimal performance.
                • Check for Lock Switch: Ensure the card’s physical lock switch (if present) is in the unlocked position.


                  Conclusion

                  Understanding SD/MicroSD card formats and knowing how to format them is essential for optimizing their performance and compatibility. Whether you’re using Windows, macOS, or Linux, formatting SD cards is straightforward and ensures that they work seamlessly with your devices. By following the steps outlined above, you can maintain your SD card’s efficiency and avoid storage-related issues.